

Timber floors, irrespective of how often they are cleaned, will need sanding and polishing at regular intervals of time so that they look the best. If you have never done it on your own, then this can prove to be overwhelming. Here’s a handy guide on how to go for timber floor polishing on your own.
How to Sand Timber Floors?
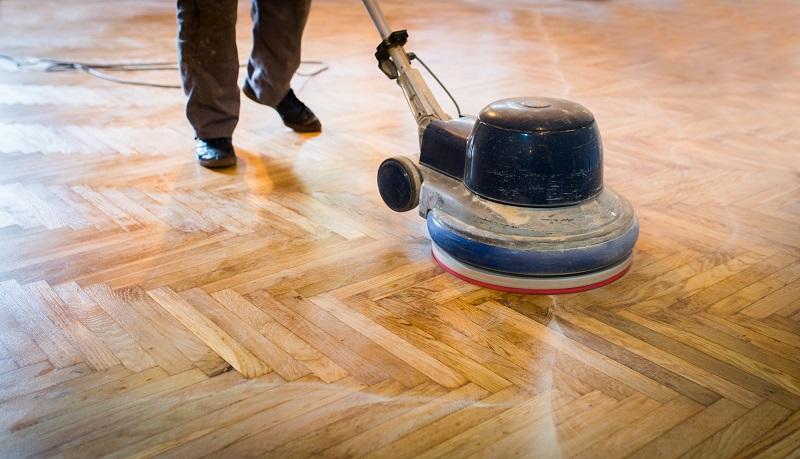
To sand timber floors, you will need a floor sander which is also called a drum sander. You will also need something called an edge sander. One more thing that you will need is sandpaper. These can be availed from local hire shops in your vicinity. To get a smooth finish, you will have to sand the floor four times. For this, start with sandpaper discs of 40 grits. Gradually move it up to discs of 60, 80 and 120. When using the floor sander, it can get loud, so it is advisable to wear ear protection.
Tools
A floor sander (also called a drum sander) and an edge sander is needed for timber floor polishing. Both and the sandpaper discs you’ll requirement for them can be found at most hire shops. In order to get a smooth finish, you will need to sand the floor multiple times, starting with 40 grits sanding discs and graduating through 60, 80 and finally 120 grit discs. The floor sander is a heavy, loud piece of equipment, so you will need to wear ear security when you use it.
Both and the sandpaper plates you’ll requirement for them can be found all things considered contract shops. To get a smooth completion, you should sand the floor multiple times, beginning with 40 corn meal sanding plates and graduating through 60, 80 lastly 120 coarseness circles. The floor sander is an overwhelming, uproarious bit of hardware, so you will need to wear ear security when you use it.
Process of Timber Floor Polishing
When using a drum sander, lower the sanding disc onto the floor slowly. Remember to sand with the grain. When the sanding disc touches the floor, move forward slowly. Please don’t stay at the same position, or it may end up digging the floor. The movement should be forward, and not backwards. Keep sprinkling some kerosene on the floor in front, to avoid the sandpaper from getting clogged by the timber oils.
When changing the sandpaper from 40 to 60 grits, remember to fill nail holes with timber putty and let it set as well. For the edges of the floor, you will need the edge sander and 60 grit sandpaper discs. You can follow with an 80 grit sandpaper to get a smoother finish in timber floor polishing.
How to Polish Timber Floors
One of the most commonly used finishes used in timber floor polishing is the polyurethane finish. It is available in single or two pack formulations. The fumes are very toxic, but they are safe when dry.
Remember to wear protective gloves and eyewear, and if possible, carry a respiratory device as well. Remember to keep the area ventilated when applying the finish.
There are oil-based resins as well that are popular too and don’t pose as many health hazards. There are options like matt, semi-gloss, or gloss finishes. Due to sanding, the oil in the timber comes up to the surface. So before polishing, you have to wipe the surface with a cloth, and some methylated spirits. Around the edges, apply a coat of polish with a brush. Now apply an even coat over the floor with a roller. This has to be done with the grain. Let it dry for 8 hours or more.
The floor has to be sanded with a 120 grit sandpaper to smoothen the roughness of the first coat. Before the second coat, clean the sand dust. The entire process takes about three days, then for 24 hours after that, the floor has to be kept free from foot traffic.
If you follow these tips well, then timber floor polishing won’t prove to be a difficult and troublesome task for you.