

VLC Media Player is known to support almost all video formats and codec. But at times, MP4 videos won’t play in VLC Player. They stutter, buffer, show black screen, freeze or throw error. It’s annoying when the player is compatible with the MP4 video and its audio-video codecs.
So why sometimes VLC is not able to play MP4 files?
The problem could be with VLC settings, or your player is not updated. Or you are trying to play a very high-quality MP4 file, which slows the media player. There’s also a possibility that the MP4 file you are trying to open is corrupt or damaged.
But whatsoever the reason, you can fix MP4 video not playing in VLC Media Player.
This post shares the 5 methods, which you can try to play MP4 files in VLC Player seamlessly on your computer.
Methods to fix VLC Player not playing MP4
- Update VLC Media Player
The first thing to try when VLC is not playing MP4 files is to update the media player. Updates can speed-up the player, add new codecs support, improve features, and fix bugs, if any.
You can visit the VLC website to install the latest version or check for updates in the player.
Steps – How to update VLC Player
- Open VLC Media Player on your computer.
- Click on Help > Check for Updates. If an update is available, it’ll display an update message box. Click Yes.
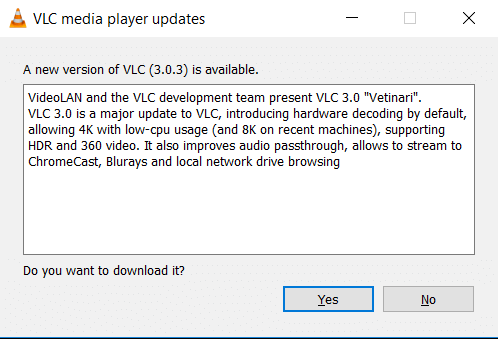
Figure: VLC Player update dialog box
- Next, follow the prompts to install the software updates.
- Disable Hardware Video Decoding in VLC
Hardware acceleration decoding in VLC utilizes the GPU or video card of your PC instead of the CPU to play high-resolution videos smoothly.
If MP4 video is not playing in VLC Player, try disabling hardware decoding in the player. This will help to fix MP4 videos playing choppy, freezing, or stuttering.
Follow the below steps to disable hardware decoding in VLC:
- In VLC Media Player, click on Tools > Preferences.
- At the bottom-left, under Show settings, check ‘All.’
- In the left bar, click Input/ Codecs > Video Codecs > FFmpeg.
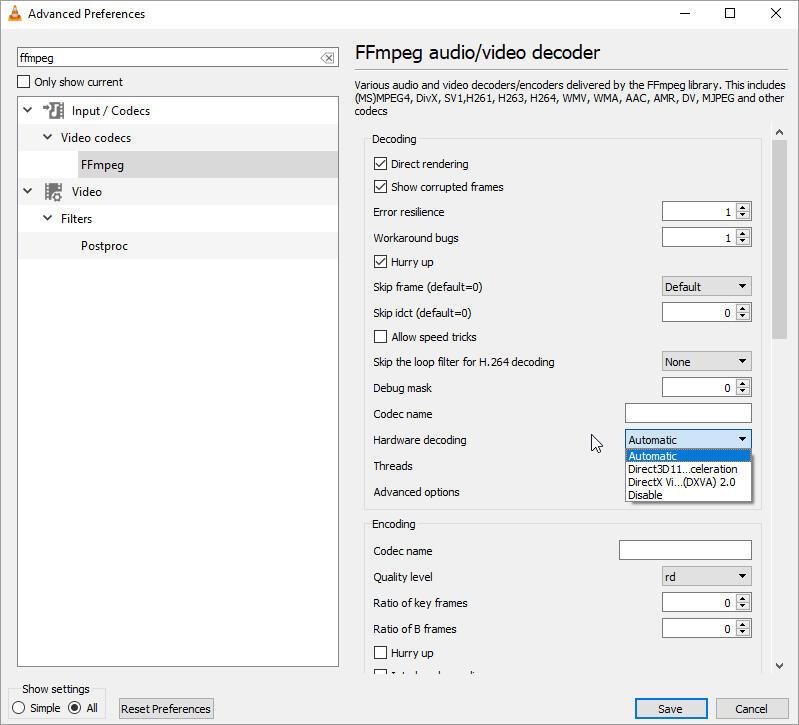
Figure: Disable Hardware decoding in VLC
- On the right pane, scroll to Hardware decoding. Set it to Disable.
- Click Save.
- Restart VLC Payer.
Now play your MP4 video in VLC Player to check if the problem is fixed or not.
- Increase cache values in VLC Player
Is the problem occurring while playing online videos in VLC? When you stream a video, VLC Media Player loads some cache files on your computer for continuous playback. If your online MP4 video keeps buffering in VLC, increasing this cache value may help.
Follow the below steps to increase cache value in VLC:
- In VLC Player, go to Tools > Preferences.
- At the bottom-left, under Show settings, check ‘All.’
- In the left bar, click Input/ Codecs.
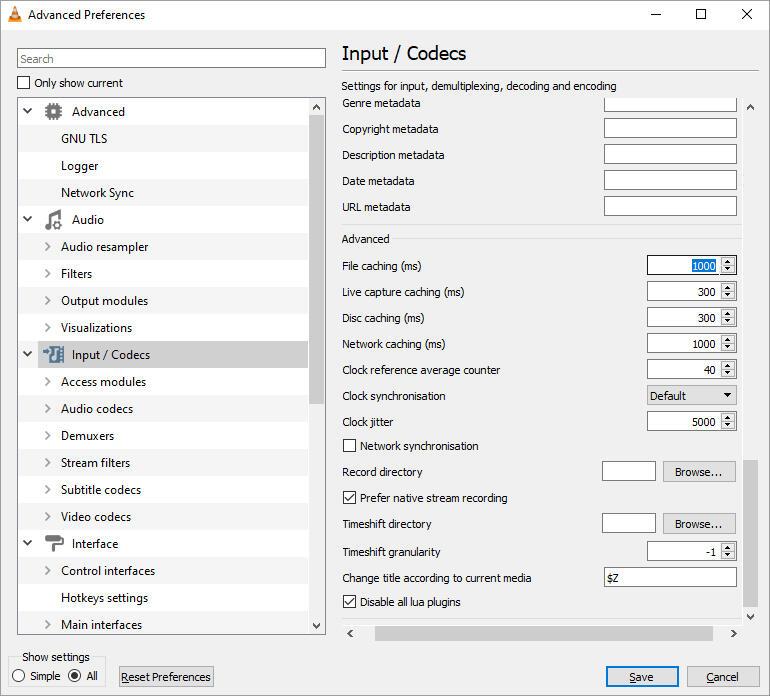
Figure: Input/Codecs pane in VLC
- In the right pane, go to Advanced section. In File caching (ms), change the value to 1000 or above.
- Click Save and restart VLC Player.
The buffering issue in MP4 videos in VLC player should be fixed now.
- Repair MP4 using a video repair tool
If the above VLC troubleshooting doesn’t work and the MP4 file fails to play in a different media player, it may be corrupt. Try a secure and efficient video repair software.
A repair software will scan the corrupt file to fix the damage in the video file header, sound sections, frames, slider movement, etc. You can try the popularly used Stellar Repair for Video to fix issues like video freezing, stuttering, broken, out-of-sync, truncated, etc.
Stellar Repair for Video supports the latest Windows 10 and Mac versions, including macOS Big Sur and Catalina.
Follow the below steps to repair MP4 video using repair software:
Step 1: Install Stellar Repair for Video on your PC or Mac.
Step 2: Click Add file to add the corrupt MP4 file/s.
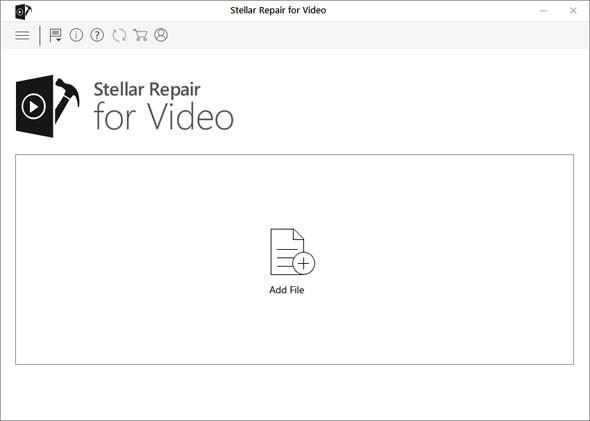
Figure: Add file screen in Stellar Repair for Video
Step 3: Click on Repair to start the repair process.
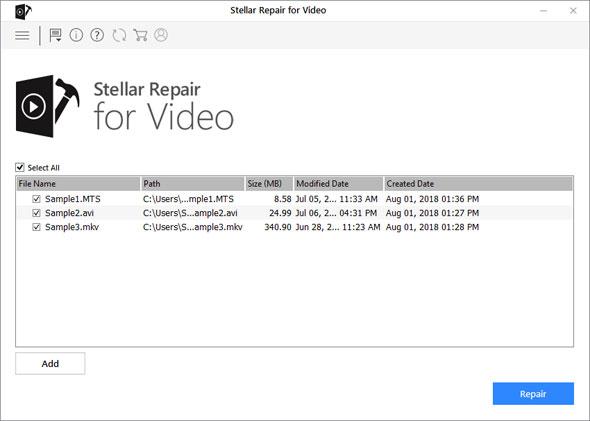
Figure: Repair button in Stellar Repair for Video
Step 4: Once the repair process ends, preview the repaired MP4, and click on Save Repaired Files.
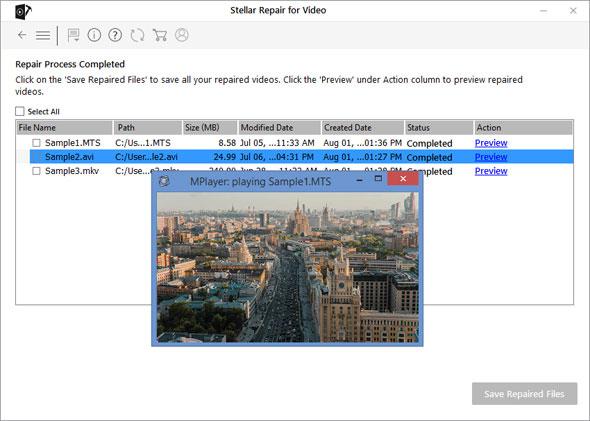
Figure: Preview window in Stellar Repair for Video
The software can fix H.264, H.265, 4K, high-quality MP4 videos shot with any camera.
- Compress MP4 UHD videos
If your MP4 file is recorded in 4K UHD with H.265 video codec, it may not smoothly play due to high resolution. You can convert it to H.264 compression format. This will compress your MP4 video and enable playback on VLC Player.
Use any secure H.265 to H.264 video converter tool, such as Handbrake, WinX HD Video Converter, Movavi Video Converter, etc.
Wrapping Up
Whenever MP4 file is not playing in VLC Player, first troubleshoot the problem using the player. Begin with media player update followed by hardware acceleration and cache value method in VLC Media Player. If your MP4 video is a high-resolution file, compress it to view in VLC Player.
If these don’t work, get a professional video repair tool that can fix corrupt MP4 files. The trusted Stellar Repair for Video is uncomplicated and a simple tool to use. It can repair any number of corrupt MP4 files in one go without any fuss.